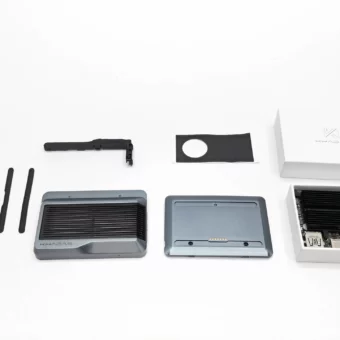
In this article, we will discuss the assembly process of the Khadas Edge2 DIY case. The Khadas Edge2 is a powerful SBC (Single Board Computer) that can be transformed into an attractive mini computer interface with the installation of the ARM mini PC DIY case. This case provides full access to all of the board’s ports, buttons, and cooling features. So, let’s get started!
Khadas Edge2 DIY Case Assembly
The Khadas Edge2 Maker kit comes with the SBC board, cooling fan, and heatsink preinstalled. The only thing left to complete the unit is the installation of the attractive case. The case was in high demand and a limited number of them were made available to customers who had already purchased the maker kit and wanted to upgrade to the ARM Mini PC layout. Please note that the offer to upgrade may no longer be available.
Assembly Steps
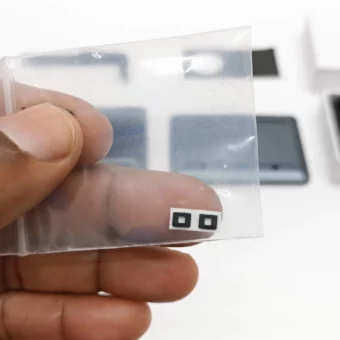
- Start by placing the two tiny square foam adhesives over the two LED indicators. These adhesives will guide the light emitting from the LEDs through two plastic tubes leading to the top of the case.
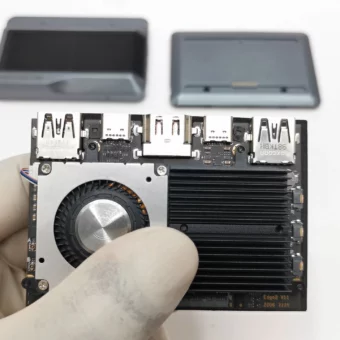
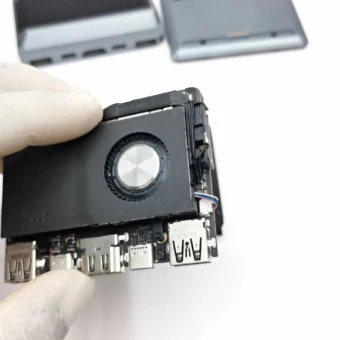
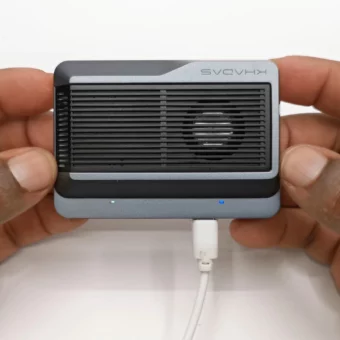
- Next, secure a 3M adhesive pad over the cooling fan and heatsink. This pad seals the top of the heatsink and channels the airflow from the fan through the heatsink and out to the side of the case where there are ventilation holes. While there is ample ventilation through the metal grill, you can remove two screws to detach the grill for an open case configuration if desired.
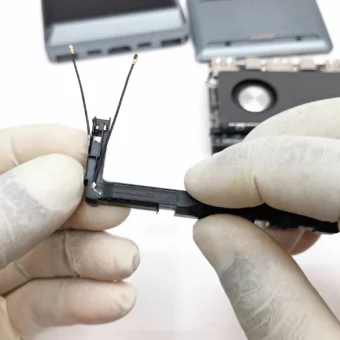
- Attach the two antennas to the plastic bracket that will cover the FPC headers. Once installed, you will no longer have access to these headers as the board will be used as an ARM mini PC. Use the adhesive and two small clips to secure the antennas to the PCB. Be careful when fastening the antennas to avoid damaging the connectors, as the pins are a tighter fit than the ones that came with the maker board.
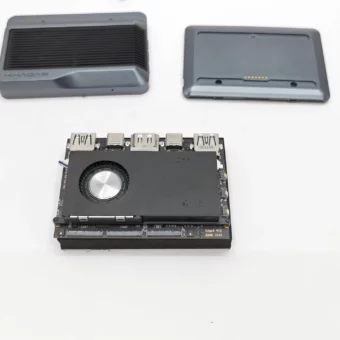
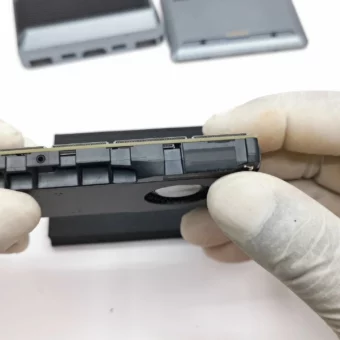
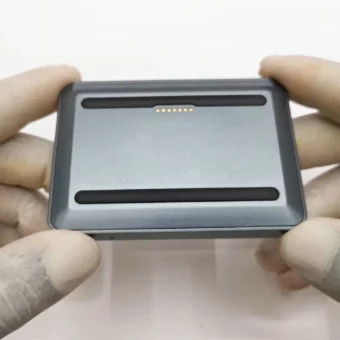
- Insert the board into the top cover by aligning the three buttons on the edge of the board and sliding that end in first. Once the buttons are secured in the slots, press down the other end to secure it into place.
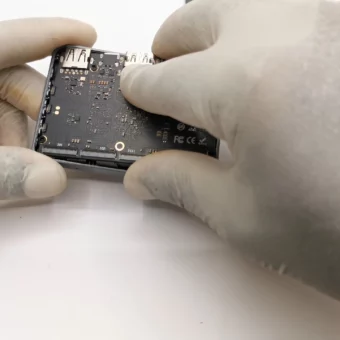
- Finally, secure the bottom panel. If you purchased the maker kit, you will need to remove the two upper screws of the cooling fan before attaching the cover, as these screws will be used to secure the bottom panel. Once the panel is secured, attach the two antiskid rubber pads in their designated slots.

Conclusion
Congratulations! You have successfully completed the assembly of the Khadas Edge2 ARM mini PC with the DIY case. The finished product looks amazing with its LED lights, metal grill for ventilation, and easy access to all of its I/O ports (except for the FPC headers). While the correct term for this setup is an ARM mini PC, it can also be used as a powerful Android TV Box. Stay tuned to the channel for an upcoming video showcasing the performance and compatibility of this unit as an Android TV Box with Khadas’s latest Android 12 firmware update. To see the awesome performance and compatibility of this unit, make sure to subscribe to the channel and hit the notifications bell so you don’t miss the video. Thank you for joining me in this DIYBOX edition, and I’ll see you in the next video!